Showing posts with label DIY. Show all posts

Thursday, January 29, 2015

Refinishing Laminate Cabinets

Want to redo your kitchen cabinets without spending a fortune? I know the feeling. I moved into a house that was screaming 1985 every time I walked into a kitchen or bathroom. So, being a penny pincher, I turned to the internet for affordable options that would give me a better look. The biggest challenge that I faced was the material. My house has laminate counter tops and cabinets - which you can't just paint or stain. Here's my step-by-step guide to doing what I did. I only spent about $300.00, and that includes all of the hardware, paint, drop-cloths, etc. You may already have some of these materials at your disposal.

1. Decide the color choice for your new kitchen/bathroom. 
Keep in mind, if you have white cabinets and very little sunshine, that the color could really change the mood of your room and make it much darker. Also, it's terrible to have to get half way through your project and start over because the color isn't right...not that I did that more than once...


2. Clean your cabinets.
I used hot soapy water to clean the dirt off of the cabinet doors. We also had some issues with mold inside our cabinets due to a water leak, so I made sure all of the cabinets were cleaned inside and out with mold spray.


Before
 3. Take down the doors
This is a surprisingly difficult process if your doors have been up there for a long period of time. Don't forget to take the drawer fronts off - otherwise the whole set up may look funny. The clutter can be overwhelming, but I chose to see it as inspiration to finish faster! **If you have as many doors and drawer fronts as I do, you should probably write on the inside of them where they go, that way you don't spend extra time trying to figure out where they go when hanging them back up.**


4. Sanding Time
This is so much fun. At least pretend, because you have a lot to do! Sand every door, drawer front, and face frame. Make sure to get all of the edges/sides so that the paint wont chip. Don't peel the laminate off if it's stuck on there pretty well, otherwise you may have bumpy paint.


If the laminate is peeling off of the boards, this step is the most important. Take your time and make sure that the surface is completely smooth. You may need to apply a thin layer of putty to the door if it's really rough, that way you don't sand into the door too deeply. You want the surface to be as smooth as possible, otherwise every little imperfection will show in the paint job. 

It's best to do this outside, otherwise you'll have very dusty furniture. You may also want to wear a mask because if you have as many doors to do as I did, you'll be breathing in a lot of dust. 

5. Paint Party
Time to grab your rollers and get to painting. Depending on how your painting your project, keep in mind that there are rollers specifically made to paint cabinets. These are very helpful if you're not doing a design or if you just want a really good base coat. You don't need any special paint finish because you will be painting a sealant on top of the paint, so get whatever is cheapest. The only thing you should care about at this stage is the color!


Make sure to go in the same direction each time you roll your paint, otherwise you will be able to see lines. Also, it's very easy to mess up the edges while painting because many laminate cabinets have round edges at the tops and bottoms so there is no stopping point when painting, so make sure you go completely under the door if that's the case. Make sure to use thin, even layers. I recommend doing at least 2 layers of paint, I did 3 on my cabinets. I also had paint/primer in one, so if you don't buy that type of paint, you should probably use a primer, especially if you're going from dark to light or light to dark. Be sure to read the label on the paint can and give it sufficient time to dry and cure between coats. Otherwise it wont dry or it will get bumpy.


I'm not sure how much space you have to paint, but this is the only system that worked for me (space-wise). I didn't want the paint to get everywhere, but I also didn't want what I've painted to get smudged, so I placed each door on a ladder so that the paint wouldn't get messed up and I could paint the edges at the same time.

6. Seal It
 This is the most important step. Don't forget to seal your doors. I highly recommend using Johnson's Water Seal on your cabinets because it's nearly impossible to scratch. I have redone my bathroom cabinets and my kitchen cabinets, and so far nothing has scratched or chipped! This is exterior, oil-based sealant, so be sure to purchase the proper brushes for the job. I couldn't find rollers for oil-based paint, so I had to use a brush. The finer the bristles the better - it makes for a much smoother finish. Be careful in selecting your sealant because many of them are tinted and it can throw off your paint color. You can pick any finish - I chose satin and I love it!


I applied two coats on my cabinets just to be safe. The key to a smooth sealant is to make sure your brush/roller is completely saturated. If there is any beading on your doors, it will dry that way and give a texture that you don't want. Don't forget to let it cure between coats or before hanging. I waited at least 24 hours between coats, usually 48 hours (unless it was raining). If you don't, you risk scratching and smudging your work - and at this point it's worth the wait not to have to redo them!

7. Pick your Hardware
This is where most of my budget went. I spent about $150 on hardware. To me, this was completely worth the cost because it gave my cabinets a whole new style. Depending on what hardware you choose, the price can be much higher or lower than mine. I chose knobs and pulls that were between $3.00 - $3.50 each.


Installing the hardware was tricky because it's very difficult to drill evenly into plywood. I ended up making a template out of some old cardboard and using that to guide me in the installation process.

8. Hang the Cabinets!
 This is the most fun because you get to see all of your hard work pay off!


Friday, May 9, 2014

DIY Gifts for Mother's Day by Interests

Mother's Day is on its way.  Whether you are ready for it or not, it's coming!  For those of you who procrastinate (or who don't), I figured this post would be a great way to round up some ideas that you can do for the different "types" of mom's in your life.  Just follow the links under each photo!


1)  The "Green Thumb" Mom

This is the mom that likes to be outside.  She enjoys gardening, being in the sun, taking in all that nature has to offer!

17 DIY Garden Ideas
Source: Beauty Harmony Life

Stone Garden Markers
Source: Garden Therapy


2) The "Mocha" Mom

This mom loves her cup of Java.  They know her at (every) Starbucks and they make her beverage before she even gets there.  This mom may be highly dangerous if she has not had her caffeine fill for the day.


An In-Home Coffee Bar
Source: Schaaf House

If you are looking for a simpler version, here it is...and it's on wheels so Mom can have coffee anywhere she goes! : )


Note: This link does not have directions on how to make this coffee bar.
Source: For the Home

For a simpler idea....


10 Hand Painted Mugs
Source: Homedit

3) The "Technological" Mom

This mom loves all things electronic.  From, iPads to eReaders to cell phones and everything in between, this mom always has the latest gadget.  She is never without her electronic devices.  She can frequently be found on Facebook, Twitter, Pinterest, Instagram, and any other social media site.  

DIY iPad Cover & Stand
Source: Practically Functional
Or, you could organize your Mom's technology nook (aka Office).  Take a look at these simple "hacks" and  organization ideas.  That way she can spend more time doing what she likes...socializing!

Smart Home Office Designs
Source: Better Homes and Gardens


4) The "Crafty" Mom

This mom loves her DIY projects.  Whether it's photography, building something, sewing or quilting, this mom knows how to make something awesome from scratch.  If you get homemade Christmas sweaters every year, you probably should look into the following gifts for this type of mom.

How To Sew Cases, Bags, and Buckets
Source: How About Orange

Polaroid-esque Coasters
Source: Darkroom and Dearly


5) The "All Natural" Mom

This mom typically shops at Whole Foods, Fresh Market, and Trader Joe's.  She buys only organics and she can frequently be found purchasing only beauty products, foods, and other items that are full of health benefits and lack in chemicals.

Source: Don't Mess With Mama

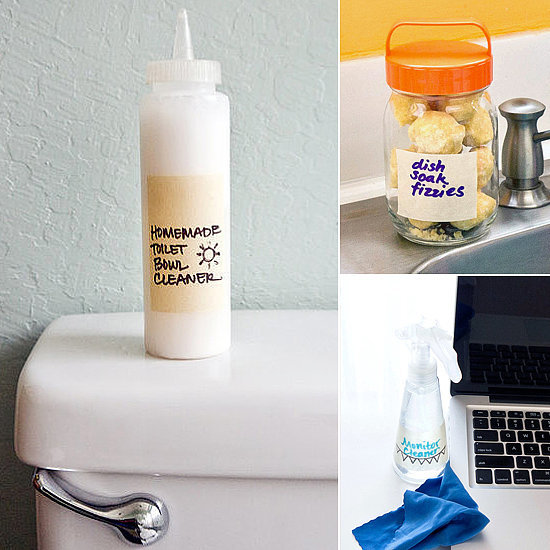
39 DIY Cleaning Products for Pennies
Source: Popsugar
Although your mom may not want a bunch of cleaning products for Mother's Day, why not present these to her and then give her the gift of a day off...and you can clean instead!

6) The "Fashionista" Mom

This mom is up to date on fashion.  She knows what is in style and what should never be worn again.  This mom never wears anything twice.  She loves accessorizing and shoes!


Source: Born in '82

23 Amazing and Easy DIY Shoes and Bags Projects
Source: Syle Motivation

Hope this gives you many gift ideas for how to celebrate your mom!

Please note, some moms may fall into more than one category or no category at all.  This post is not all inclusive and only touches on a few select mom types.  

Friday, November 8, 2013

A Thankful Spirit: Beds, Clothing, and Memories


With the arrival of November also comes the arrival of a thankful spirit.  November (and the holidays) are a time to reflect on all that we have and to give to those that are less fortunate.  In light of this this, I want to start the month by reflecting on a few things that we have to be thankful for...

1. Warm Bed

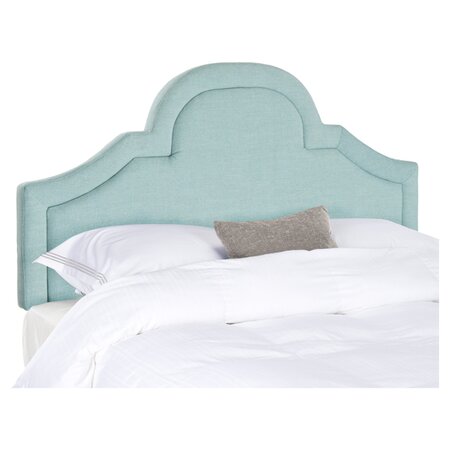
Beds are wonderful.  They offer a cozy place to rest our heads each night.  Beds come in a variety of shapes and sizes and can even be dressed up with the right headboard.  

Here are unique headboards to consider for your sleepy retreat.

This headboard is made from an old mantel.  So unique!

Source: Joss & Main
Source: Lovely Crafty Home


If you are looking for ideas on how to make your own headboard, click here.

2. Clothing

Clothing is definitely a reason to be thankful.  Aside from providing warmth and protection, it also is an avenue to show the unique personality of each individual.  With this in mind, be sure to take good care of what clothing you do have.  

Closets provide space to keep your clothing from getting squished, damaged, or dirty.

Source: Decore com Gigi

Source: Woodmaster Woodworks, Inc.

Source: Luv Decor


3. Memories

This day and age we have the opportunity to travel.  We are able to visit with loved ones and explore new places.  Our experiences mold us.  Usually, all we are left with are memories, pictures, and souvenirs.

Be sure to display those memories!!  

Built-Ins, even in the bedroom, can be a wonderful way to remind us not to forget our pasts.  Use built-ins for books, souvenirs, pictures, or any other trinket or treasure.

Source: Woodmaster Woodworks, Inc.

Source: DIY Network

Source: Two Inspired Design
For more great ideas, visit our previous post about bedroom built-ins!


Thursday, October 24, 2013

DIY Gift Ideas: The gifts that keep giving!

With the holidays right around the corner, I'm sure many of you have begun to consider what to give to your loved ones as gifts.  You don't have to break the budget trying to show your loved ones that you care. With a bit of  time and innovation (and Pinterest) you can make a personalized gift that beats those everyday items AND helps the environment.  


1. Wooden Leaf Chargers

Image: Thistlewood Farms


Give a gift that will be used for multiple seasons.  Wooden leaf chargers made from plywood can add a seasonal touch and a unique way to update the typical place mat.  Here are the following directions from Thistlewood Farms on how to make these simple yet festive wooden leaves.

Don't feel obligated to use a leaf.  Consider other ideas such as an acorn, a pumpkin, a snowman, or any other shape that you desire.

2. Old frames, new purpose

Places such as Goodwill and yardsales can be the perfect place to find old frames.  Give that forgotten frame new purpose with some paint and embellishments.  Here are some other ideas for you to consider.  

Source: Plaid
Make a collage to display old post cards or precious documents. 
Source: Digital Design Scrapbooking
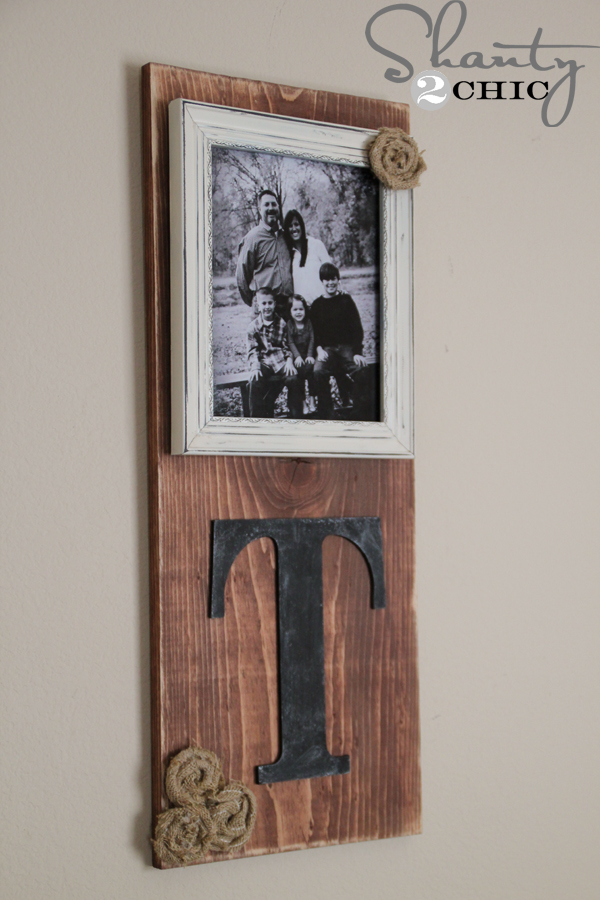
Use an old frame to create a calendar.  

Click here for directions from Shanty2Chic on how to make this project.
Looking for more ideas?

Source: It's Always Autumn

3. Windows

Repurpose old windows by making them into a shelf or unique display for photos.  For directions, click the link located below the picture.

Source: Adventures of a Middle Sister
Source: Jax & Mia
Source: Connoisseur of Creativity

4. Candle Holders

Give a gift that looks good and smells great!

Source: Country Girl Home

Source: The Country Chic Cottage


These are the gifts that keep giving.  Check back with us to see new ideas posted each week!

-Woodmaster Woodworks, Inc.

Friday, September 27, 2013

Fall Decorating 101


In honor of fall being a season of change, why not give your home a fresh look?

Here are 3 tips for trading your summer sun decor for fabulous fall looks!

1. Color

Color is characteristic of fall.  Changing leaves, bright colored foods like squash, corn, and apples, and colorful sweaters, scarves, and boots.  Here are a few autumn color palettes by Design Seeds that may help inspire you.


Not inspired yet? Find a custom color palette by visiting the Design Seeds website.


2. Replace your flowers for foliage

Flowers are great accents for any time of the year, but why not use leaves (real or fake), to spice up your home.

Here are some unique ways to use foliage in your home!


Use hand picked leaves to create a leaf bowl.  Both charming and useful.  

Get the full post + instructions from The Krazy Coupon Lady.


You can also frame your favorite leaves, place them on your mantel, or use them to make a luminous jar for a candle.
.  


3.  Trade "Nautical" for Knotted and Natural Accents.

With fall in our midst, give in to the elegance and charm that nature has to offer.  Although a stick can look just like...a stick, a cluster of sticks can be made into a lovely centerpiece. 


Love this!!
Find the original post at {baked.good.}

Not fond of wood in its natural state?  Paint or glitter can add personality.  


Basically, you can use just about anything found in nature to spruce up your home.  

Including but not limited to....

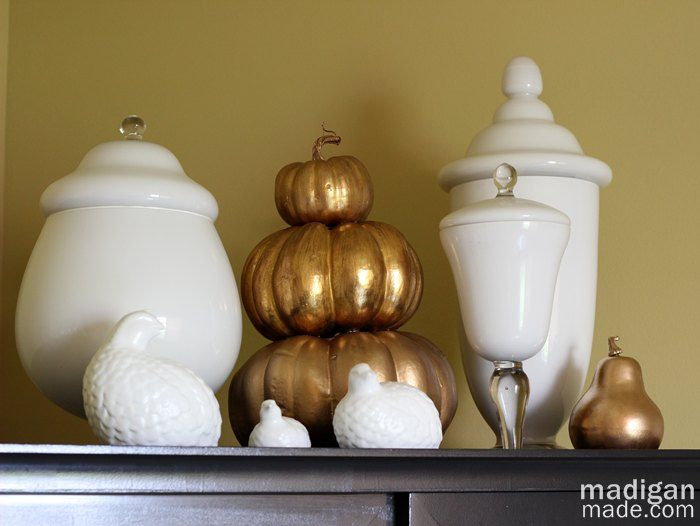
Gourds


Mix a variety of textures, colors, and heights to create an appealing focal point.
Read the original blog post at Madigan Made


Pumpkins


Look again at the use of different heights
and colors by 
Thistlewood Farms.


Acorns


Wheat or Grain


or corn, seeds, pinecones, and more!  It's whatever you desire.

and finally......

4. Don't be afraid to incorporate fall accents EVERYWHERE.


On your table...
Image: Shelterness


in your dining room...
Image: Thistlewood Farms

in a bedroom
Image: momtoob

....a mantel...


or in your living room.
Image: Finding Home

You get the idea.

In general, fall brings lots of GREAT treats.  Have fun and happy decorating!!